
Are you looking to transfer your site from a local to a live server? Or are you looking to make a clone of your site? Do you want to transfer your site from one server to another server? In this article, we will learn about Migrate Guru plugin.
Well, if your answer is yes for any one of the questions above then you are at the right place. In this article, we’ll be looking at how you can transfer your site with just one click using the Migrate Guru plugin.
Migrate Guru Plugin
Migrate Guru is the fastest way to migrate WordPress sites. It simplifies difficult WordPress migrations (e.g. multi-site networks, 200 GB sites, etc.).
Powered by BlogVault (an onboarding partner of top WordPress hosts in the world), Migrate Guru uses intelligent processes on its own servers… So there is ZERO risk to your sites. It automatically rewrites URLs, bypasses import-export scripts, and handles serialized data. It also can clone WordPress sites without any manual work, add-ons, or additional tools.
Installing the Migrate Guru Plugin
To migrate your site, you need to install the plugin from the WP dashboard on the site which you want to transfer. Go to the WP dashboard and navigate to Plugins -> Add New.
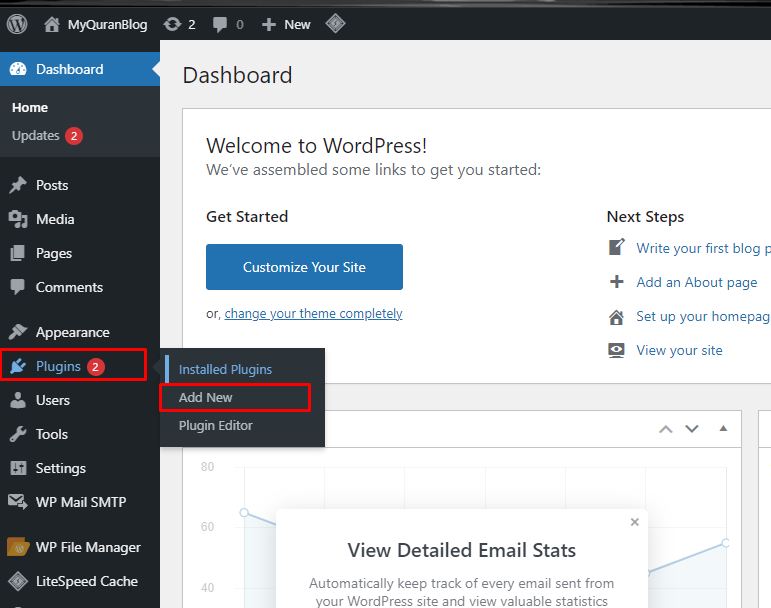
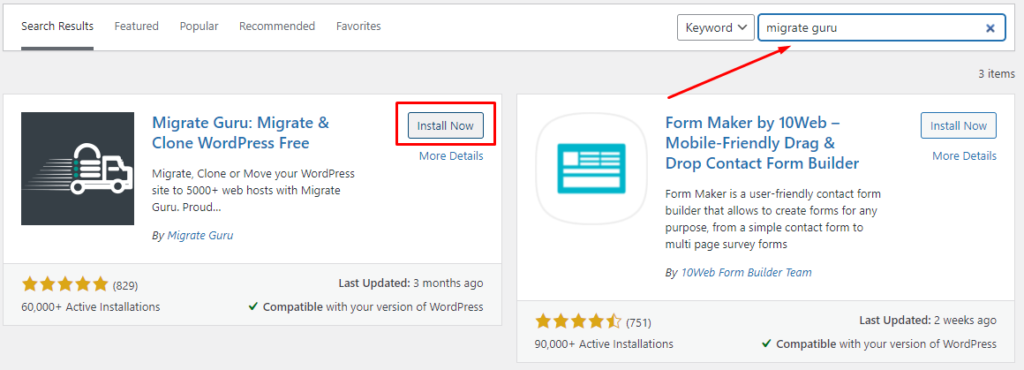
Type “migrate guru” in the search bar and hover over the first result displayed. Click Install to install the plugin.
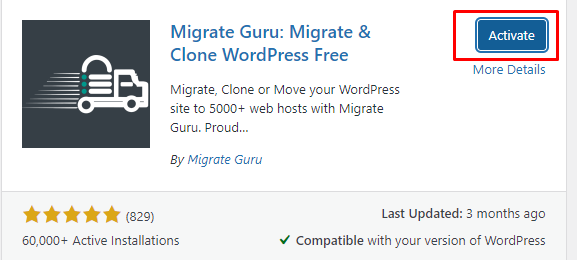
After the installation is complete, click on the Activate button to activate the plugin.
Creating a New Site in CyberPanel
I am creating a new site in the CyberPanel, if you have already created one then you can skip this step. Go to your CyberPanel dashboard and head over to Websites -> Create Website. Then fill in the relevant information and click on Create Website.

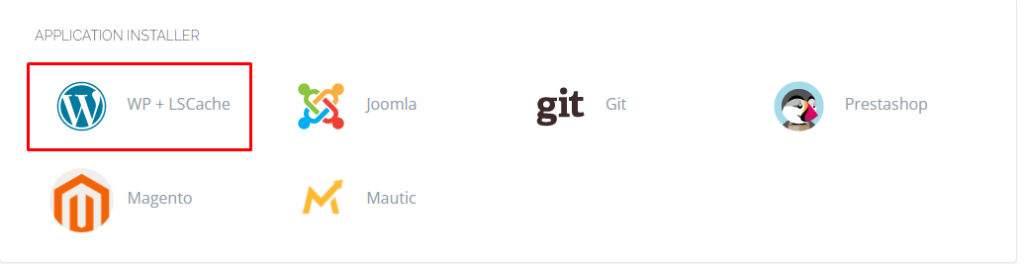
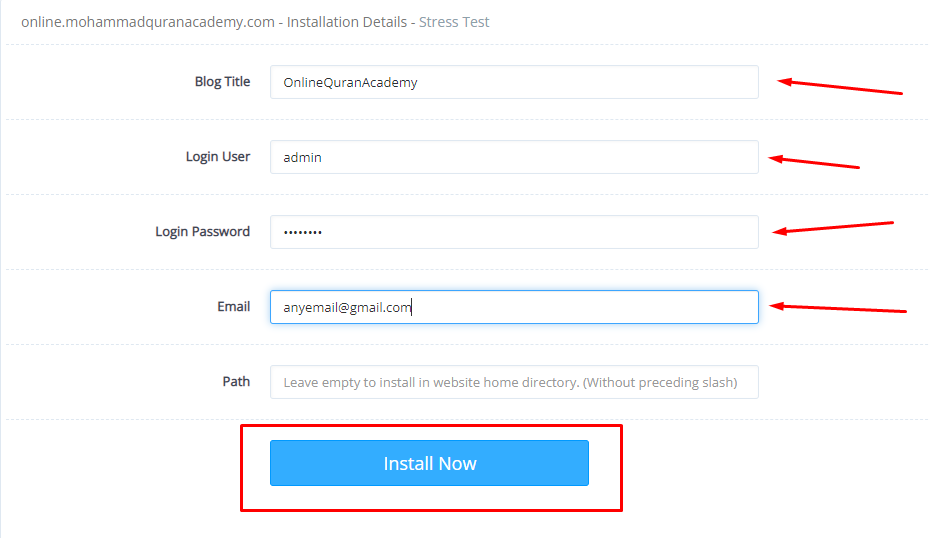
Once the site is created, go to the website’s management page and scroll down to the bottom of the page. You will see the Application Installer category. Click on the WP + LSCache from that category to install WordPress on your new site.
Enter the information in the input fields and click on Install Now.
Creating an FTP Account
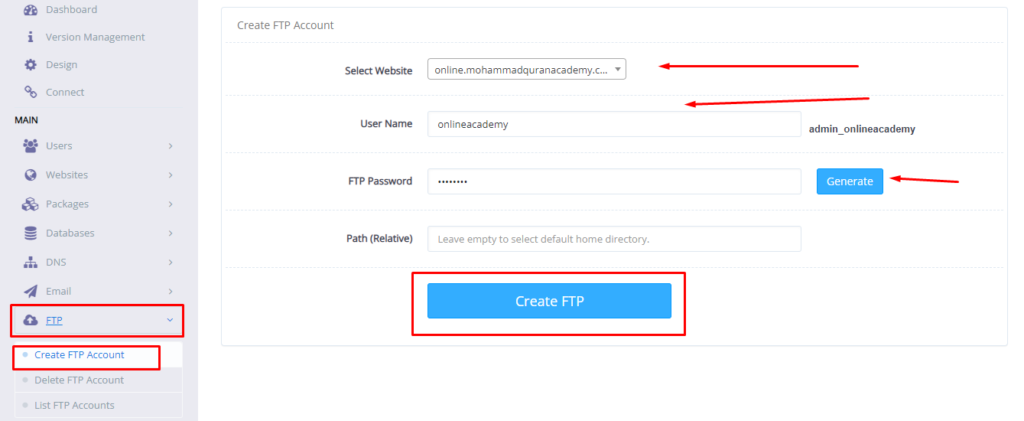
Now after the WP installation on your site, you need to create the FTP account for the domain. This information will be used later on when transferring the files. Go to FTP -> Create FTP Account in CyberPanel dashboard, choose the domain and fill in the other fields as well. Then hit Create FTP button to create the account.
Adding A Records in DNS
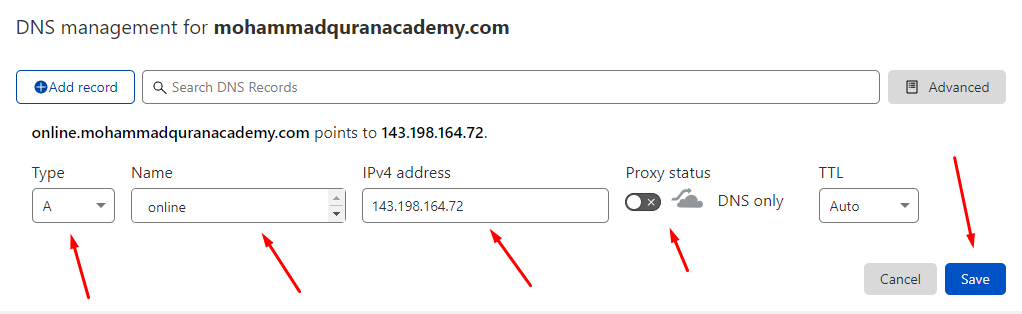
Now we need to add A records for this new domain. For this go to your Cloudflare account and go to the DNS tab.

Now add the first A record in the DNS with the same settings but remember to put your own domain and server ip.
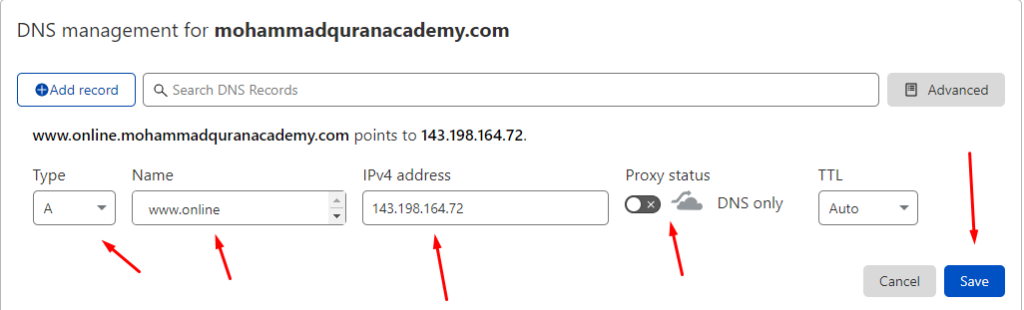
Similarly, add a second record.
Now it’s good to go. If you want to add more records just add more records that you need to add. If you have already added all records then you don’t need to add these records.
Transferring Files From Migrate Guru Plugin
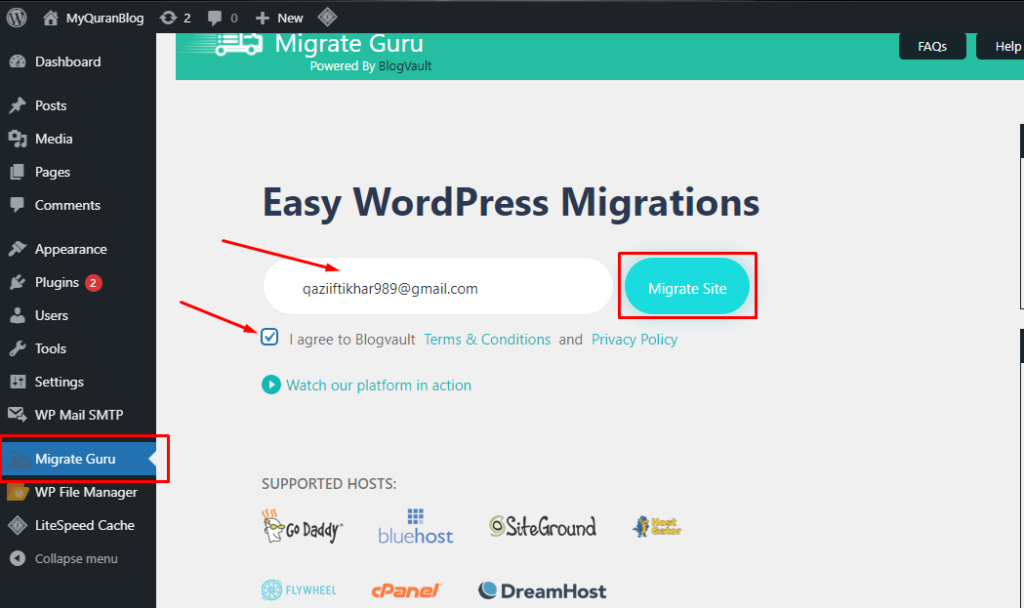
Now we are all set to transfer or migrate our site. Now go to the WP dashboard of the site on which you installed the plugin. Go to the Migrate Guru page and enter your email address, check on Agree and click on Migrate Site button.
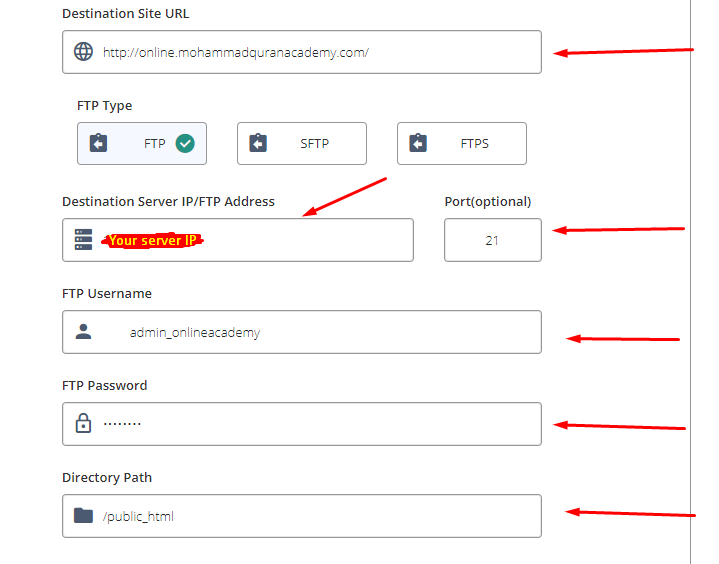
On the next page, there are different hosts available to choose from. We will be going with the last one that is FTP. Click on it to go ahead.

Now in this section, enter the destination site URL on which you want to transfer the site. Then enter your server IP address and enter the FTP credentials. The directory path will be /public_html as the WordPress websites reside in this directory.
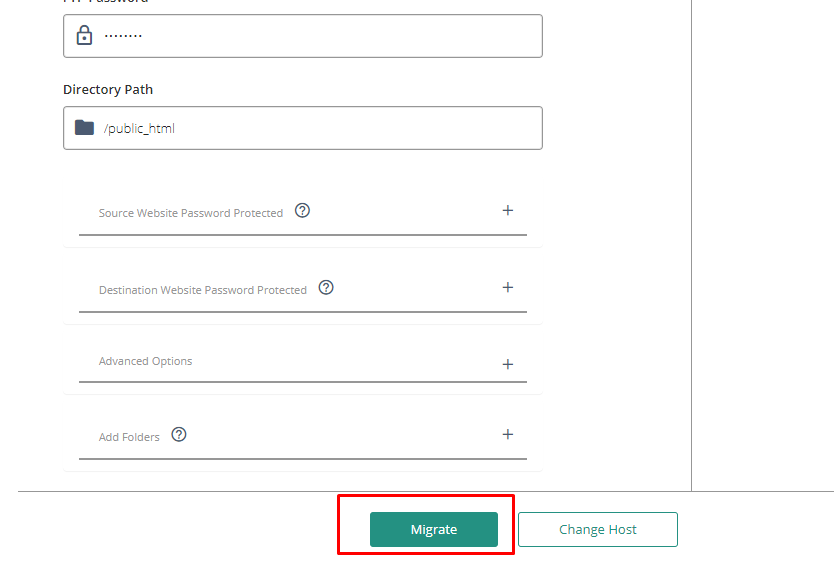
After filling in all the required information, scroll down the page and click on Migrate button to start the migration.
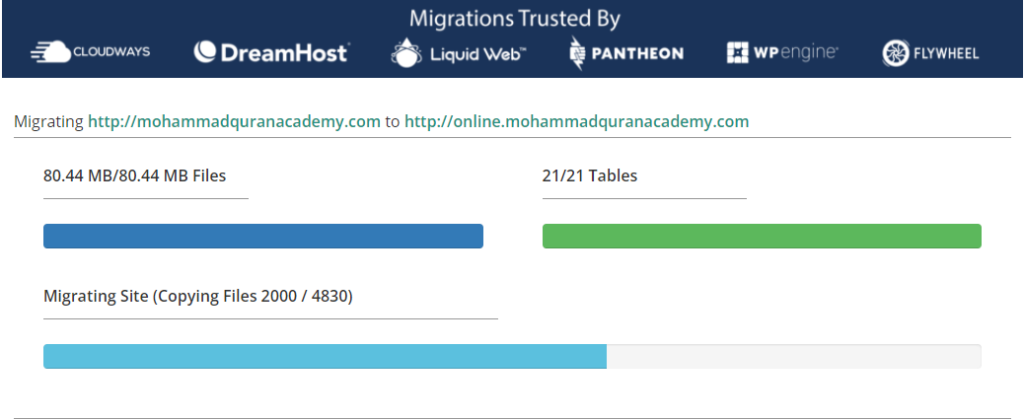
Now you will see that the migration has started and will be completed soon depending on the size of the website.
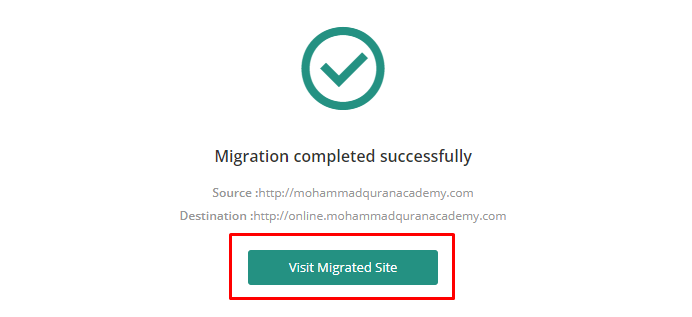
After the migration is completed, you will see the Migration completed successfully screen. Click on the Visit Migrated Site button to see our new site.
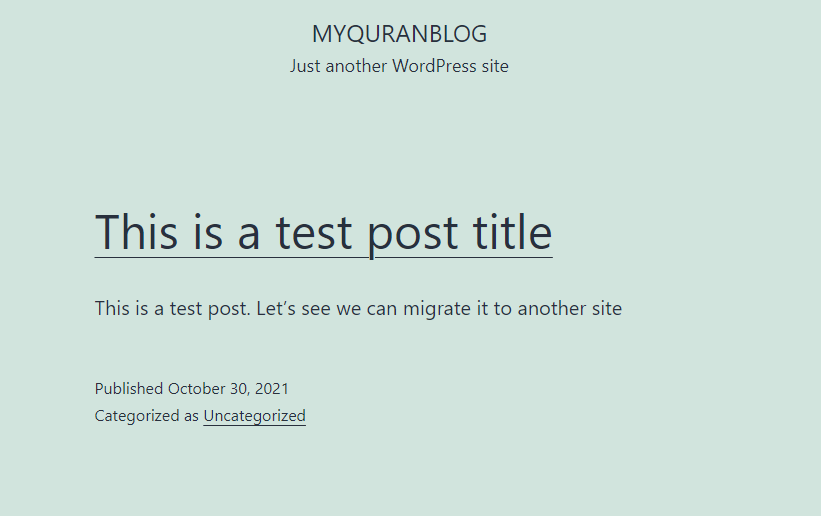
In the screenshot below, my site is migrated to a new site containing all the contents.
Migrate Guru is really a great plugin. It is easy and convenient to use this plugin for site migrations or transfers.
How to perform a Stress Test on your Web application using CyberLoader?
Follow CyberLoader on Facebook / Twitter.
Join our Facebook group.