
In this tutorial, we’ll be going through the steps of How to Configure Apache/Httpd on Ubuntu and how to set up a complete Apache web server on your machine. A complete guide of configuration Apache webserver.
To become a partner with CyberLoader Click here.
Configure Apache/Httpd on Ubuntu Table of Content
- What is Apache/httpd?
- Install Apache Complete Package.
- Configure the Apache server on your machine.
What is Apache/httpd?
Apache is an open-source web server that’s available for Linux servers free of charge. It runs on 67% of all webservers in the world. It provides many powerful features including dynamically loadable modules, robust media support, and extensive integration with other popular software. Read more
Install Apache Complete Package.
Apache Packages is available within Ubuntu’s default software repositories, making it possible to install it using conventional package management tools.
Let’s begin by updating the local package index to reflect the latest upstream changes:
sudo apt updateThen, install the apache2 package:
sudo apt install apache2
After this process, the apache web server is installed on your web server. Then you can check the status of the service
systemctl status apache2if the serves is disable and inactive then you can enable and start ther service using these commands
systemctl enable apache2
systemctl start apache2
You can verify web server, to run your server ip on your browser that give you the default page of apache server.
Read: Setup Modsecurity On CyberPanel to Protect Your Websites From Online Attacks Using
Add the Apache service in your firewall
Once you installed and activaed the service now move to next step that is addind your service to firewall using this command:
firewall-cmd --permenant --add-service=httpAfter rrunning this command the output is success and then you sould reload the firewall using this command:
firewall-cmd --reloadOnce you add and reload your firewall now you can verify that the service by using this command:
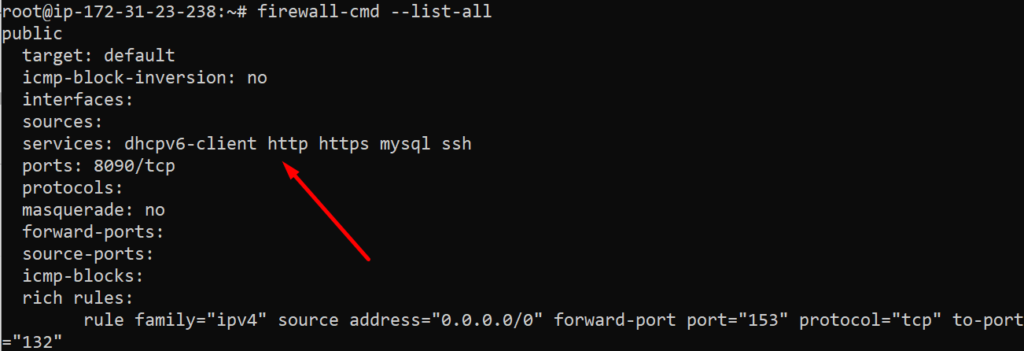
firewall-cmd --list-allThe output of this command you can see the http add in your service
Configure the Apache server on your machine.
Once installed and add service to your machine you have to configure the Apache server to your machine. For configuration first, you have to know the index.html file location that this location is for the apache default page.
Before moving forward it’s necessary to create a virtual host file with the correct directives.the file is located at /etc/apache2/sites-available/your-domain.conf directory. instead of modifying the default configuration let’s make a new one at /etc/apache2/sites-available/your-domain.conf using this command:
sudo nano /etc/apache2/sites-available/your_domain.confPaste in the following configuration block, which is similar to the default, but updated for our new directory and domain name:
<VirtualHost *:80>
    ServerAdmin webmaster@localhost
    ServerName your_domain
    ServerAlias www.your_domain
    DocumentRoot /var/www/your_domain
    ErrorLog ${APACHE_LOG_DIR}/error.log
    CustomLog ${APACHE_LOG_DIR}/access.log combined
</VirtualHost>
<Directory "/var/www/html/webserver1">
AllowOerride none
Require all granted
</Directory>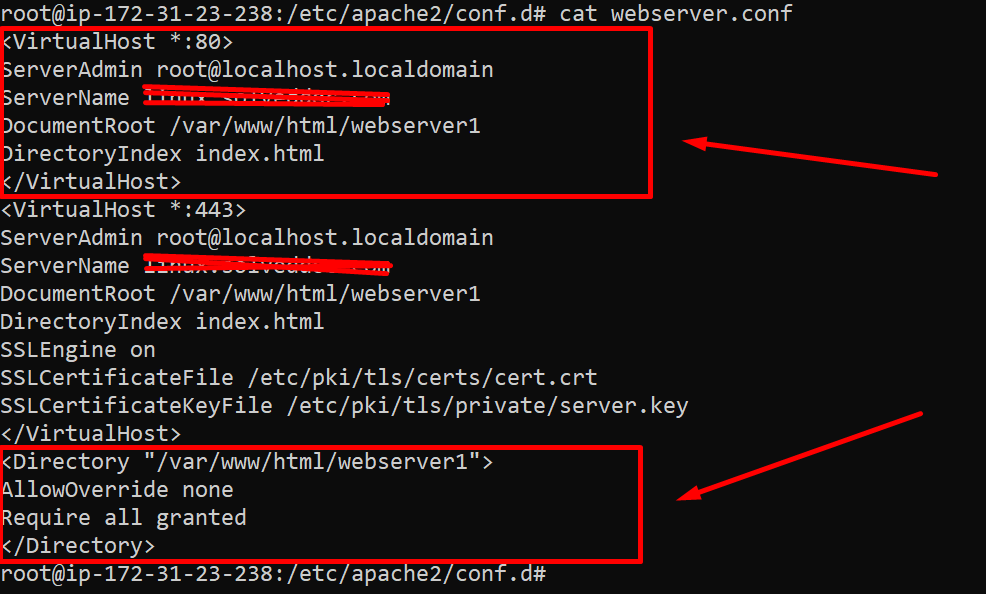
Now you can verify the setting of virtual host that you are set bu using the command
Apache2 -tif the output is the command is Syntx Ok that fine . if there is an error in ther Syntx:

than you should run this command.
source /etc/apache2/envvarsafter runnig this command you can see the Syntax Ok, that’s fine.

After this configuration you must restart you apache service by using this command
systemctl restart apache2Apache should now be serving your domain name. You can test this by navigating to HTTP://yourdomain.com, where you should see that your website is working properly.
All done for the Configure Apache/Httpd on Ubuntu you can follow this whole process and can set up successfully your Apache server. The installation process on Centos is the same but just a few commands are different.
How to perform a Stress Test on your Web application using CyberLoader?
Follow CyberLoader on Facebook / Twitter.
Join our Facebook group.