
Here in this article, we will discuss how to Install and configure the OpenLiteSpeed server on Ubuntu?
OpenLiteSpeed is an optimized open source web server that can be used to manage and serve sites.OpenLiteSpeed provides a user-friendly web interface and supports various operating systems, including Linux, SunOS, Mac OS, and FreeBSD. In this Article am going the full way of how to install and configure Lite/Speed server on Ubuntu.
To become a partner with CyberLoader Click here.
To Install and configure the OpenLiteSpeed server on Ubuntu follow these steps.
Step: 1 Update your server
First, you access your server through root ssh. once your terminal appears now you can install Litespeed on it. The first is to do update your Ubuntu system to the latest stable version by running the following command:
sudo apt-get update -y
sudo apt-get upgrade -y
Once your system is up to date, you can proceed to the next step.
Step: 2 Configer Firewall
For Ubuntu installation, you must configure your Uncomplicated Firewall(UFW). You can follow these steps and configure ufw.
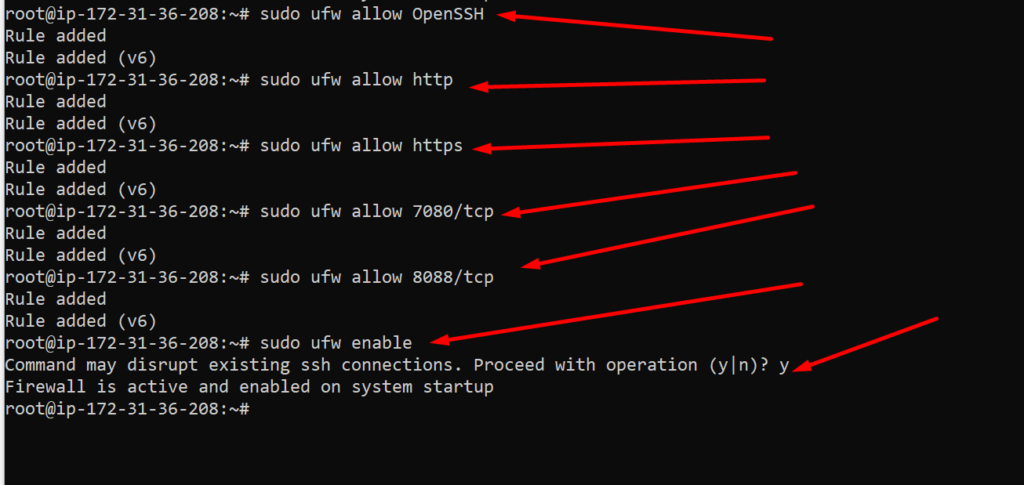
First, you enable firewall using the command:
$ sudo ufw enableAfter this run these commands one by one:
$ sudo ufw allow OpenSSH
$ sudo ufw allow http
$ sudo ufw allow https
$ sudo ufw allow 7080/tcp
$ sudo ufw allow 8088/tcp
let see the following output
After this configuration check the status of the firewall ufw run this command:
sudo ufw status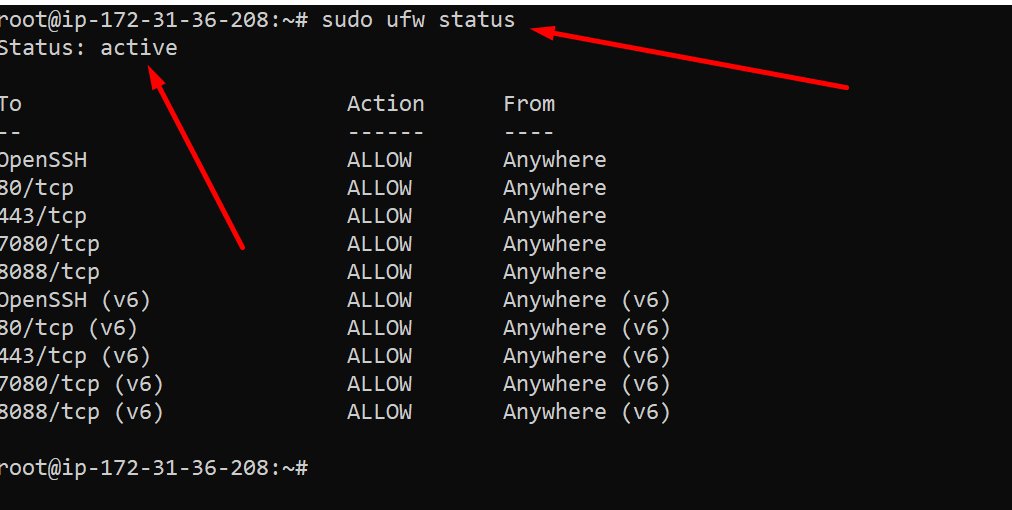
Step: 3 Install OpenLiteSpeed
There are various versions of OpenLiteSpeed you can install. We will use OpenLiteSpeed’s official Repository for our tutorial.
Add the OpenLiteSpeed Repository Key.
wget -qO - https://rpms.litespeedtech.com/debian/lst_repo.gpg | sudo apt-key add -
Once you added the Operlitespeed Repository key then Add the Repository. from the following command:
sudo add-apt-repository 'deb http://rpms.litespeedtech.com/debian/ bionic main'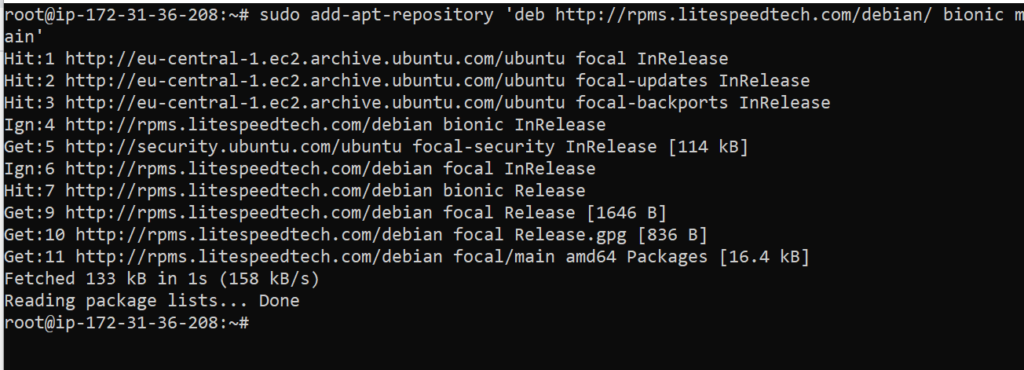
Update the Repository by this command:
sudo apt update
After this process, you can install OpenLiteSpeed. For installation you run this command:
sudo apt install openlitespeed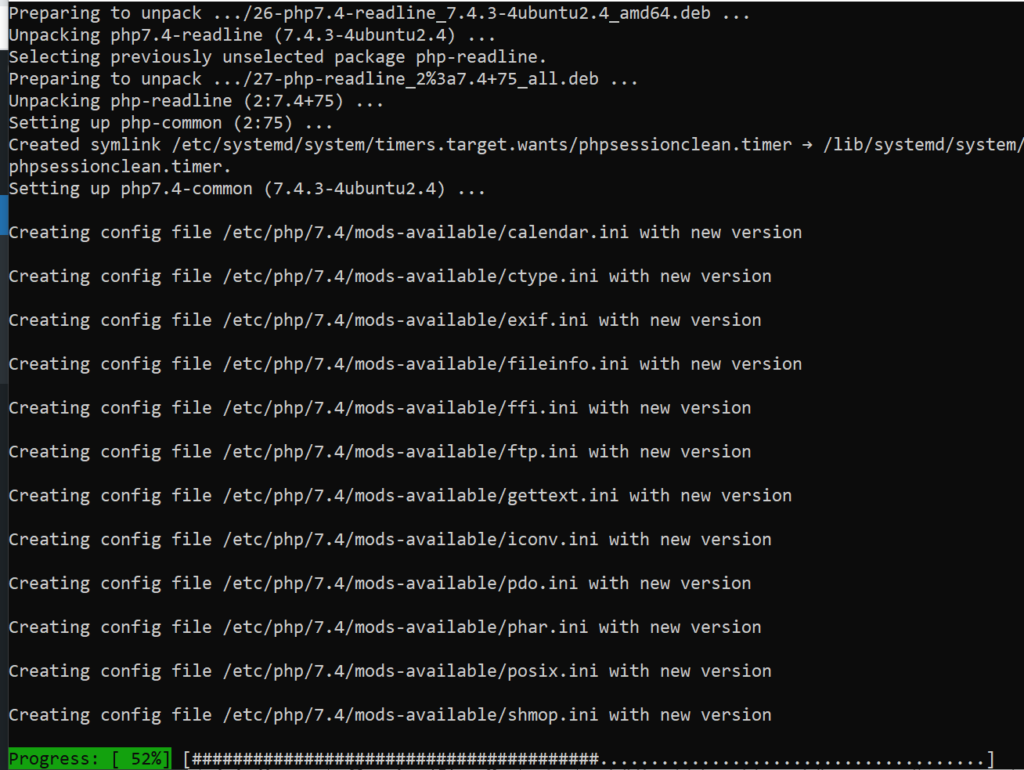
This process takes some time to install. after this process check their stats of LiteSpeed.
sudo /usr/local/lsws/bin/lswsctrl status
If it is not running, you can start with the following command.
sudo /usr/local/lsws/bin/lswsctrl startAfter these steps, Openlitespeed is installing on your system you can verify Open to access your web server. You should see the following page.
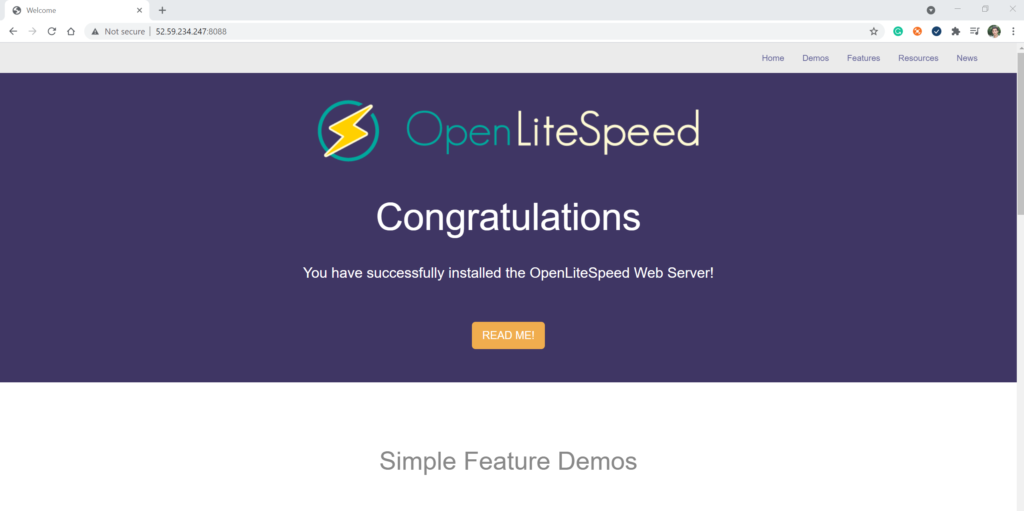
It is the default page of OpenLiteSpeed you can see if you follow the process.
Step: 4 Install PHP
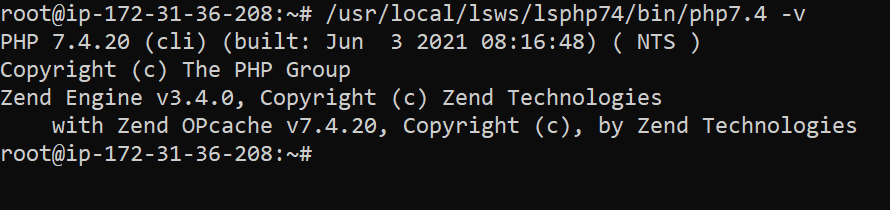
OpenLiteSpeed server PHP 7.3 which is pre-enabled. But we want to use PHP 7.4 so we will install PHP 7.4 along with some additional packages using the following command:
sudo apt install lsphp74 lsphp74-common lsphp74-mysql lsphp74-curlAfter PHP installation verify that the PHP is installed or not using this command:
/usr/local/lsws/lsphp74/bin/php7.4 -vyou can see the following output
After this You can check for the enabled PHP modules using this command:
/usr/local/lsws/lsphp74/bin/php7.4 --modulesStep: 4 Install MariaDB
Install MariaDB server using this command:
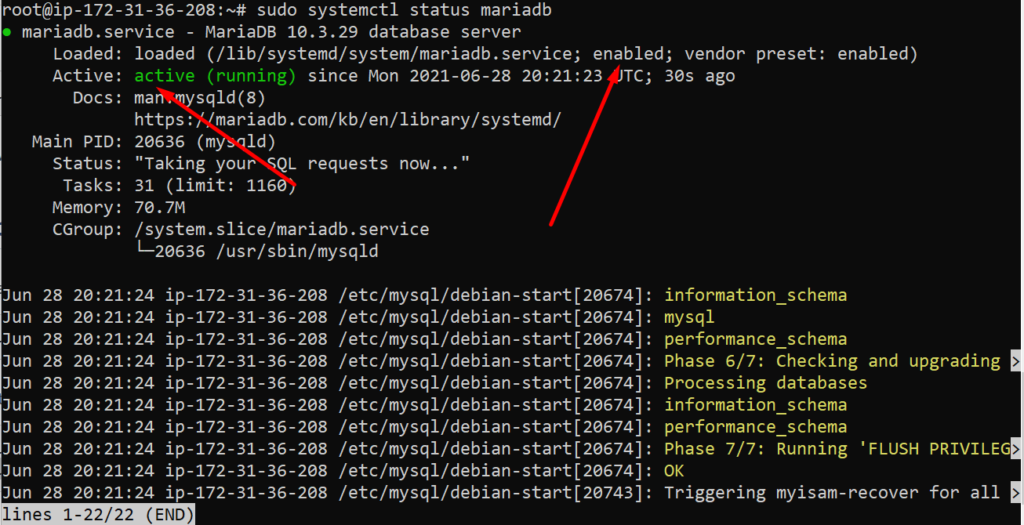
sudo apt install mariadb-serverStart and enable the MariaDB service.
sudo systemctl start mariadb
sudo systemctl enable mariadb
Check the status of MariaDB using this command
sudo systemctl status mariadbyou can see the MariaDB is installed, enabled, and active perfectly.
Secure your MariaDB installation. This script will set your root password, remove anonymous users, disallow remote root login and drop test tables. Choose a strong password and answer the questions as described below.
sudo mysql_secure_installationyou can set it up according to your choice it takes some step for installation. after installation you can see the following output:

Step: 5 Configure OpenLiteSpeed
To configuration, Openlitespeed provides us ab user-friendly GUI. so To access the Litespeed panel we have some configurations and set username and password. For setting the Administrator panel credentials run this command.
sudo /usr/local/lsws/admin/misc/admpass.sh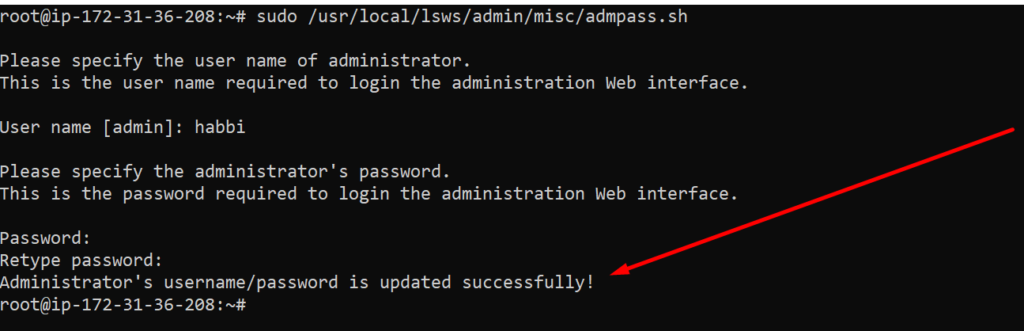
Now you can access the admin panel through open
http://<yourserverip>:7080
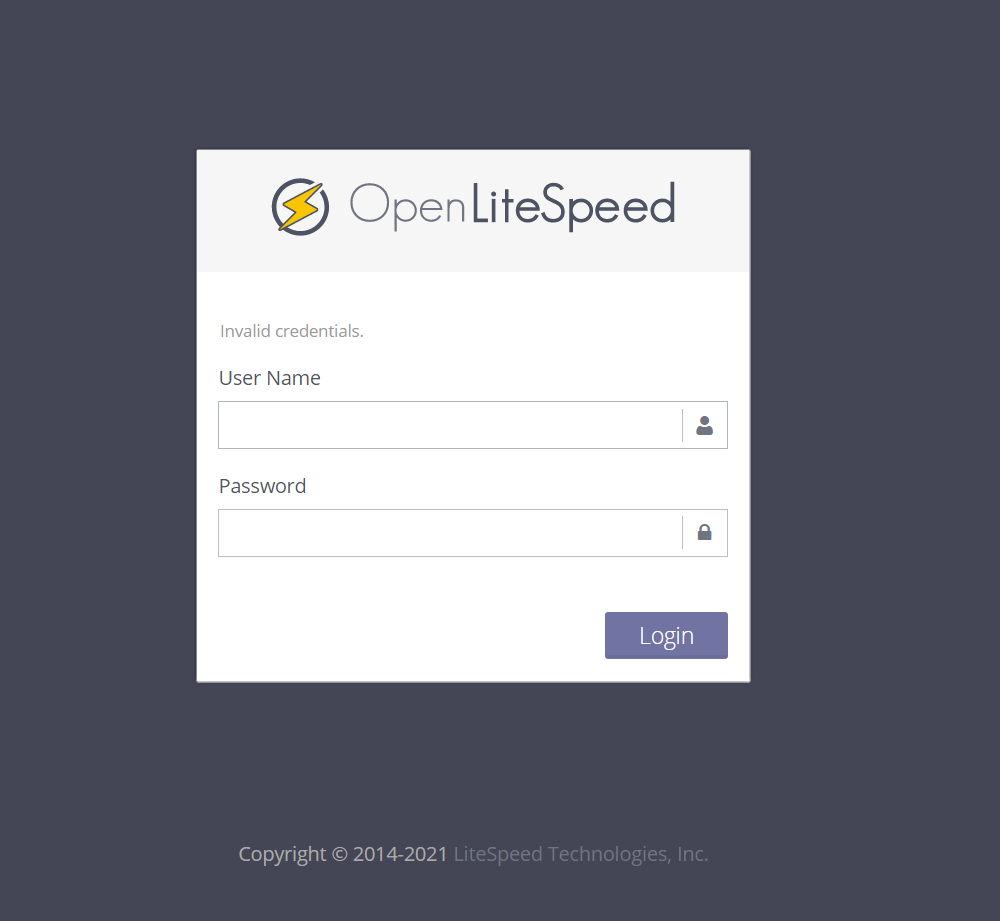
You will be greeted by the following screen now you can provide credentials and click on the login button
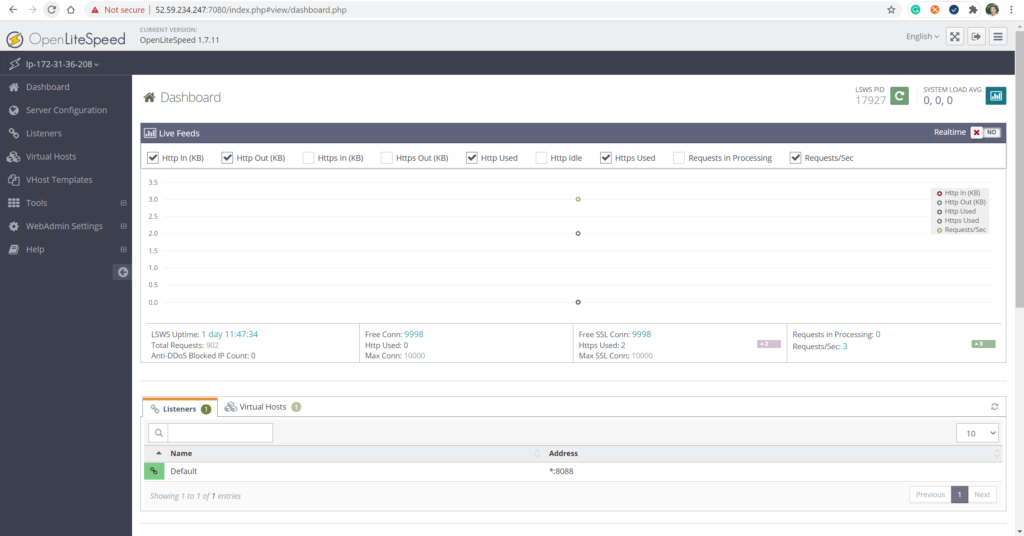
After login, you go to the Dashboard of OpenLiteSpeed
Now Switch the HTTP port back to 80. Visit the Listeners section from the left. You will see the default listeners with port 8080.
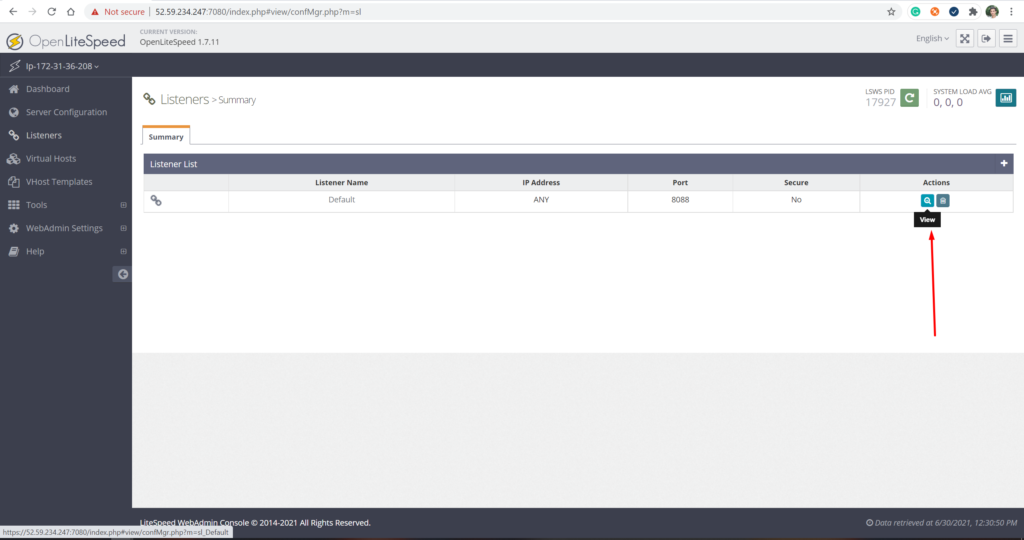
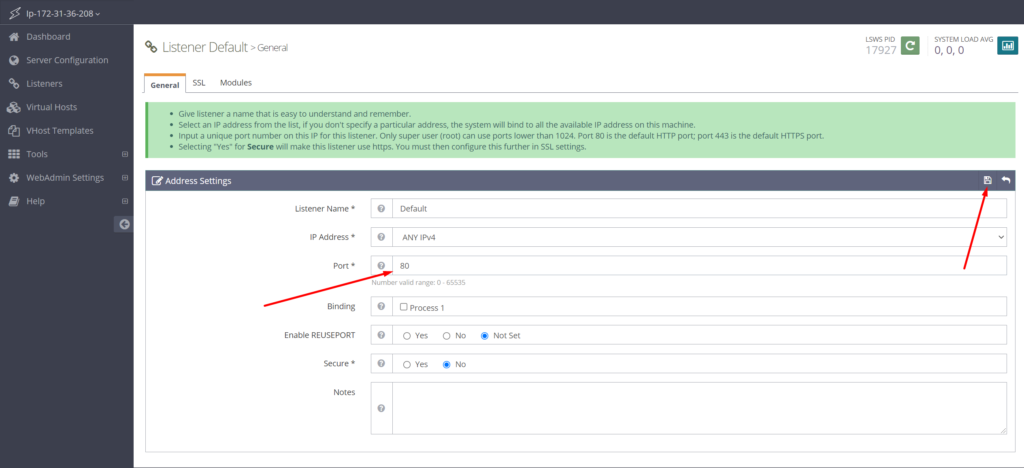
Click the View button to see the details configuration. On the next page under Listener Default > General Page, click on the Edit icon and change the port from 8080 to 80.

you can edit the default port that is 8088, you can change to 80 and click on the save button
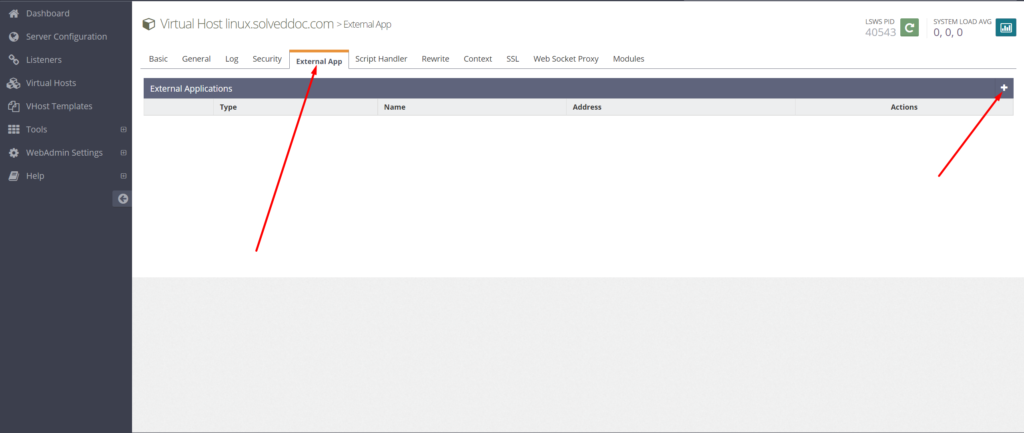
Step: 7 Configure PHP
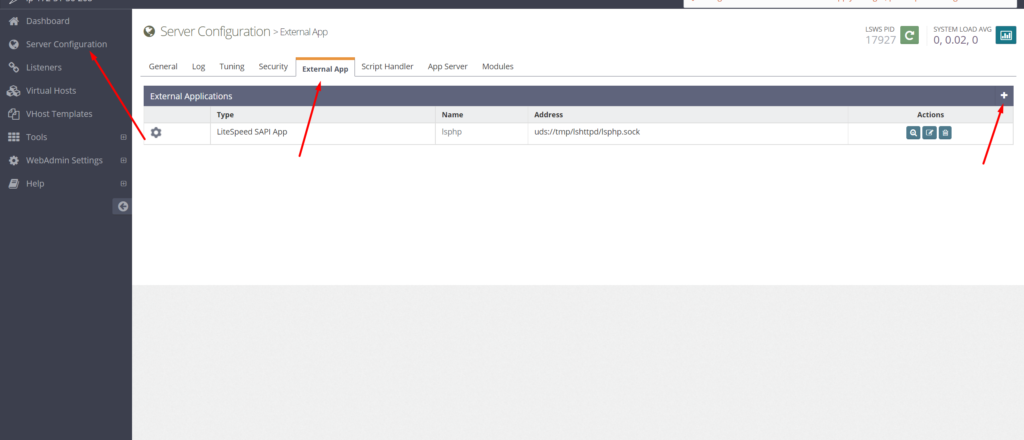
In this step, we need to associate our copy of PHP 7.4 with the server. Click on Server Configuration then on the tab External App. one configuration is the default. you can add a new one by clicking on the + button shown in the image.
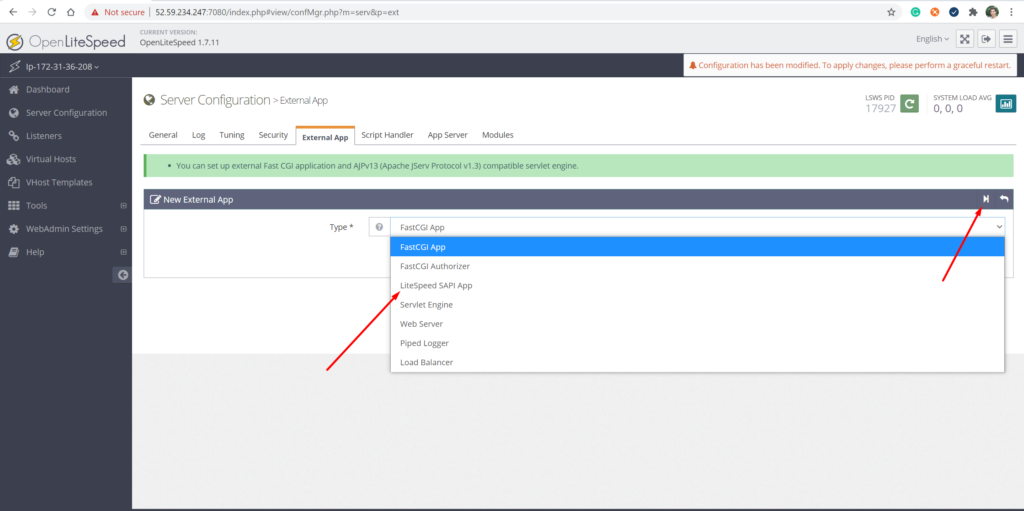
once the page is opened you can see the scroll-down list in the middle of the page select the option LiteSpeed SAPI App. and then click on the next button
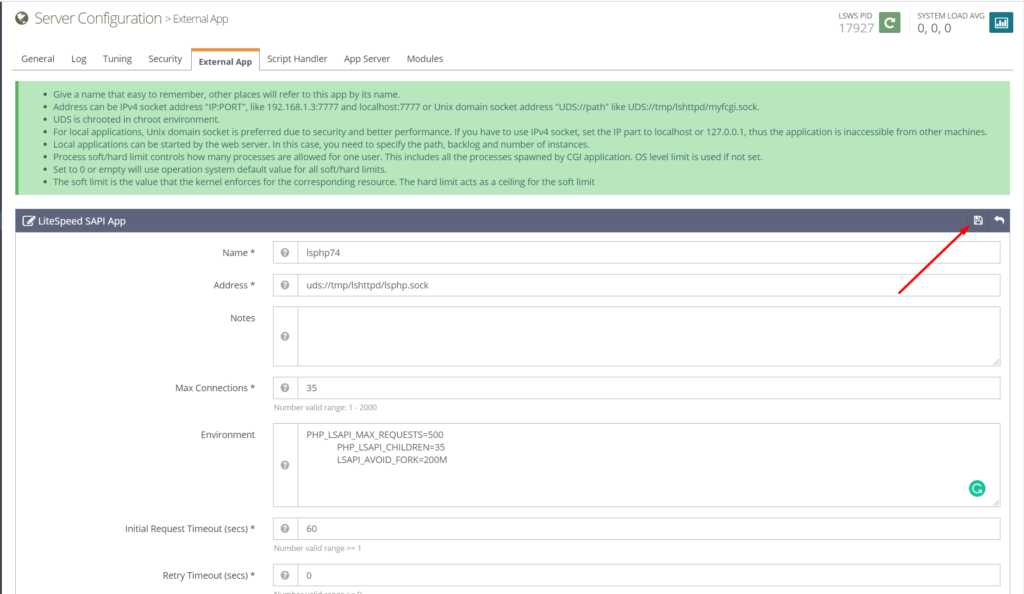
Next, add the configuration below. Leave all the other fields blank
Name: lsphp74
Address: uds://tmp/lshttpd/lsphp.sock
Max Connections: 35
Environment: PHP_LSAPI_MAX_REQUESTS=500
             PHP_LSAPI_CHILDREN=35
             LSAPI_AVOID_FORK=200M
Initial Request Timeout (secs): 60
Retry Timeout : 0
Persistent Connection: Yes
Response Buffering: no
Start By Server: Yes(Through CGI Daemon)
Command: lsphp74/bin/lsphp
Back Log: 100
Instances: 1
Priority: 0
Memory Soft Limit (bytes): 2047M
Memory Hard Limit (bytes): 2047M
Process Soft Limit: 1400
Process Hard Limit: 1500
Once this configuration is added the click on the save button shown in the image.
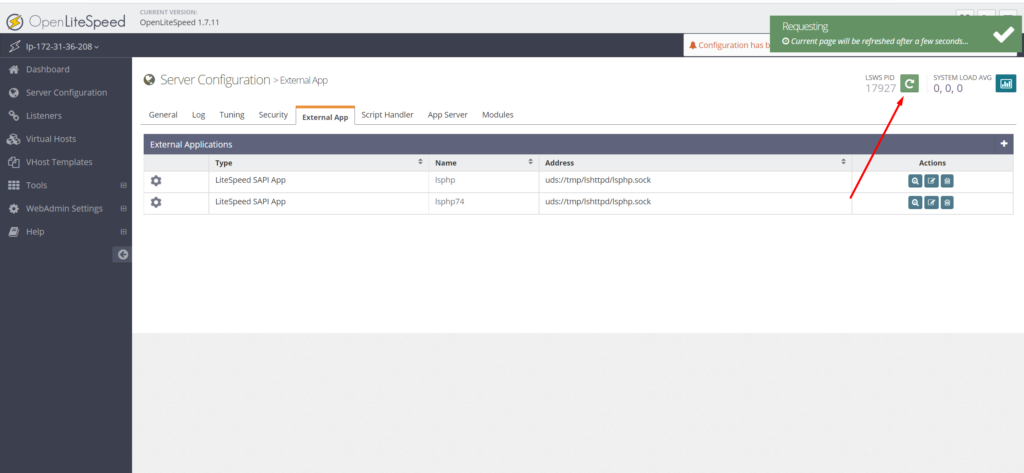
And then you will outback to the External app page. there you should Graceful restart is shown in the image below.
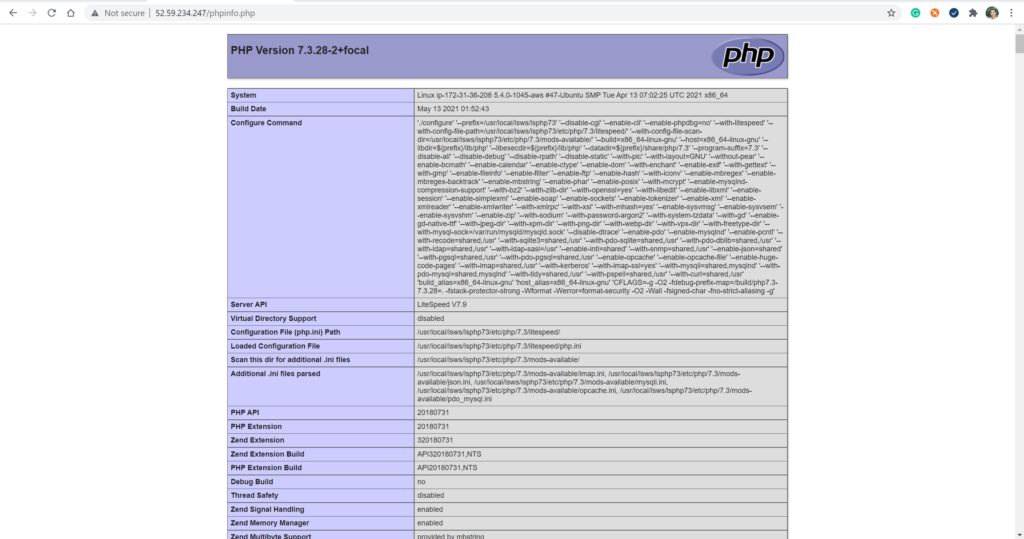
To test whether your PHP has been switched correctly, visit http://yourIPaddress/phpinfo.php in your browser.
Step: 7 Setup Virtual Host
LiteSpeed provides us a user-friendly GUI to set virtual hot but the first step is to make a directory at /usr/loacl/lsws/youwebsite.com this location using the following command, The HTML directory will hold the public files and the logs directory will contain server logs.
sudo mkdir /usr/local/lsws/example.com/html
sudo mkdir /usr/local/lsws/example.com/logs
Next, open the Admin console and access the Virtual Hosts section from the left and click the Add button.

Fill in the values as specified
Virtual Host Name: example.com
Virtual Host Root: $SERVER_ROOT/example.com/
Config File: $SERVER_ROOT/conf/vhosts/$VH_NAME/vhconf.conf
Follow Symbolic Link: Yes
Enable Scripts/ExtApps: Yes
Restrained: Yes
External App Set UID Mode: Server UID
Click on the Save button when finished. You will get the following error because the configuration file doesn’t exist as of now. Click on the link to create the configuration file.

Click the Save button again to finish creating the Virtual Host.
Once the virtual host is created, go to Virtual Hosts -> Choose Virtual Host(example.com) -> General and modify the configuration as given.
Document Root: $VH_ROOT/html/
Domain Name: example.com
Enable Compression: Yes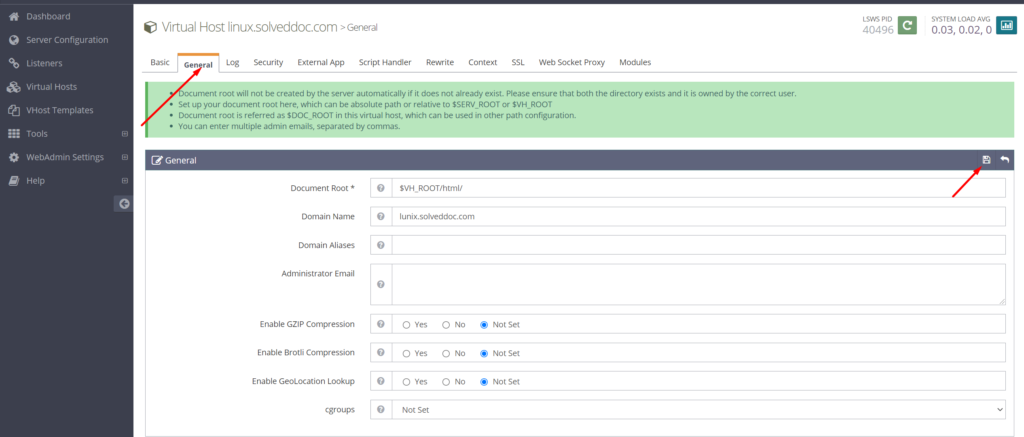
Click the Save button when finished. Next, we need to set up index files.
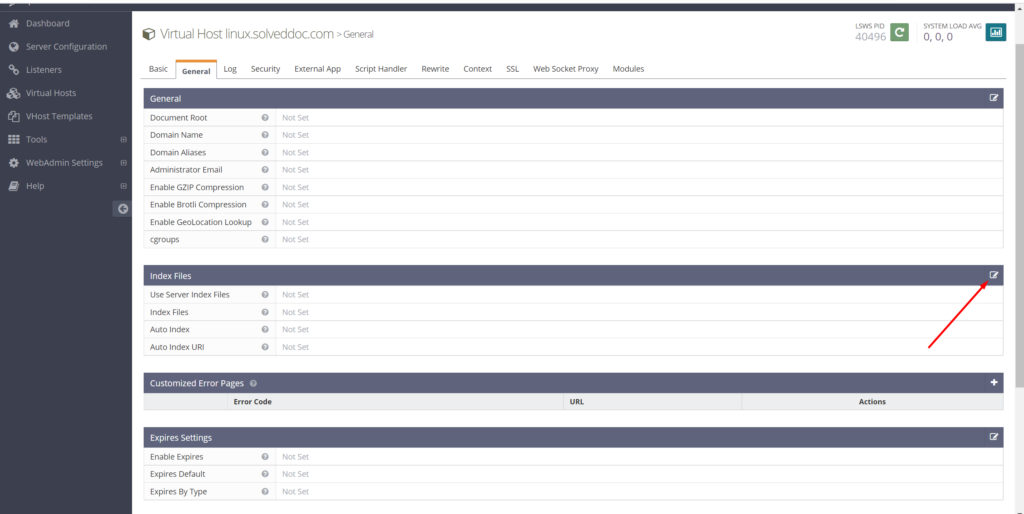
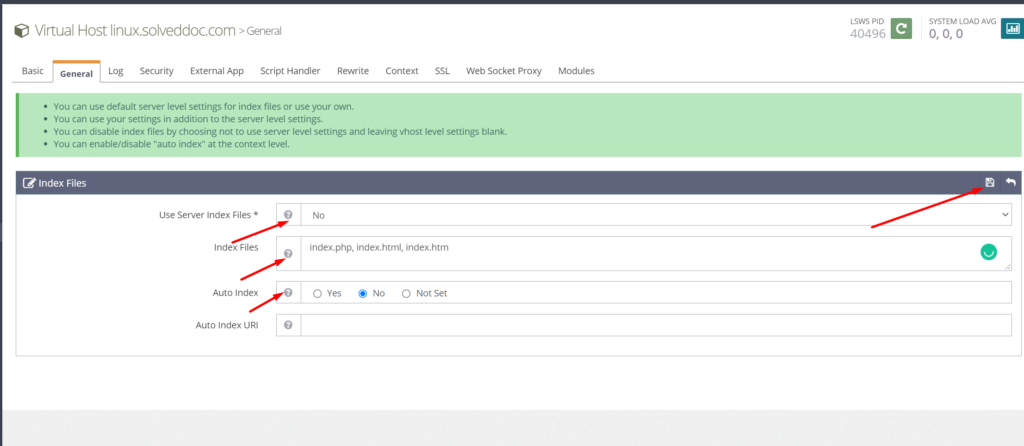
Click the edit button against Index files below the General Section. Set the following options.
Use Server Index Files: No
Index files: index.php, index.html, index.htm
Auto Index: No
Add this configuration and click on save
Next, we need to choose Log files. Go to the Log section.
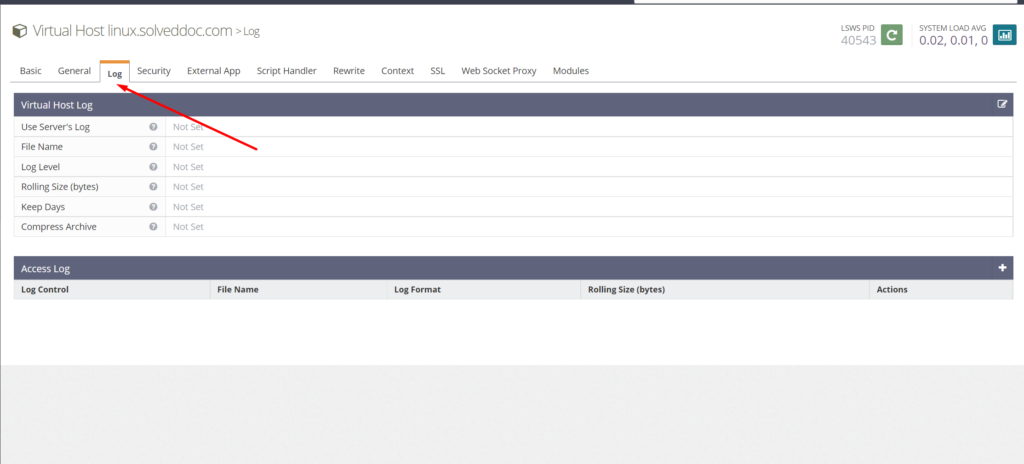
Click Edit against Virtual Host Log and fill in the following values.
Use Server’s Log: Yes
File Name: $VH_ROOT/logs/error.log
Log Level: ERROR
Rolling Size (bytes): 10M
Add this and click on save button
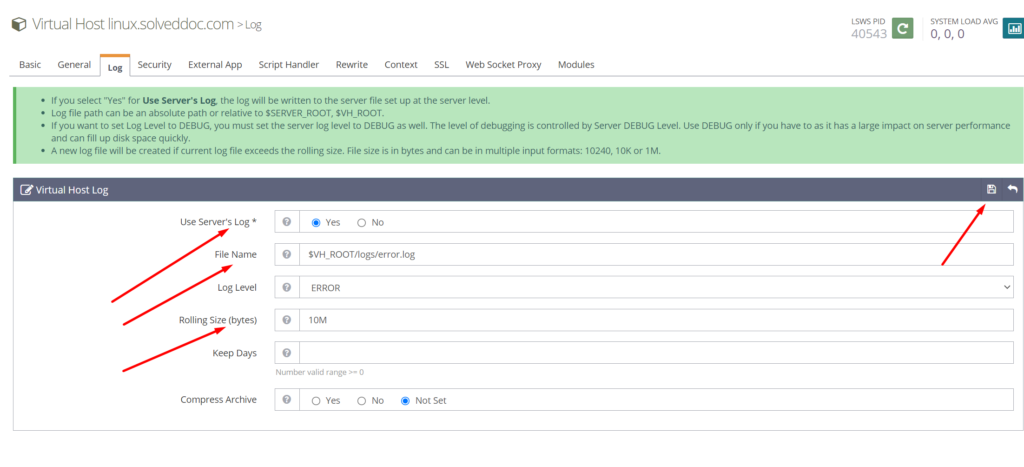
You can choose the Log Level as if you are on a production/development machine.
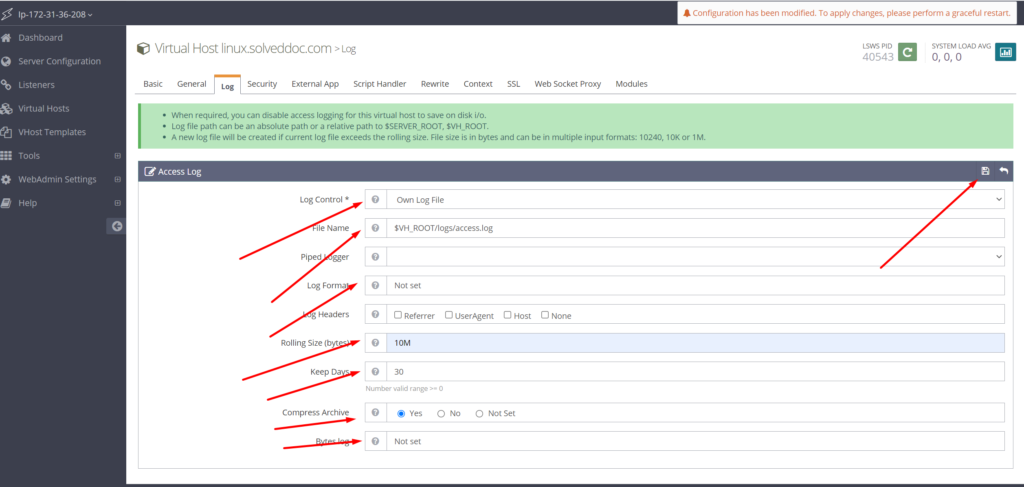
Click Save and then click the plus sign in the Access Log section to add a new entry. Fill in the following values.
Log Control: Own Log File
File Name: $VH_ROOT/logs/access.log
Piped Logger: Not Set
Log Format: Not Set
Log Headers: Not Set
Rolling Size (bytes): 10M
Keep Days: 30
Bytes log: Not Set
Compress Archive: Yes
add this and click on the save button
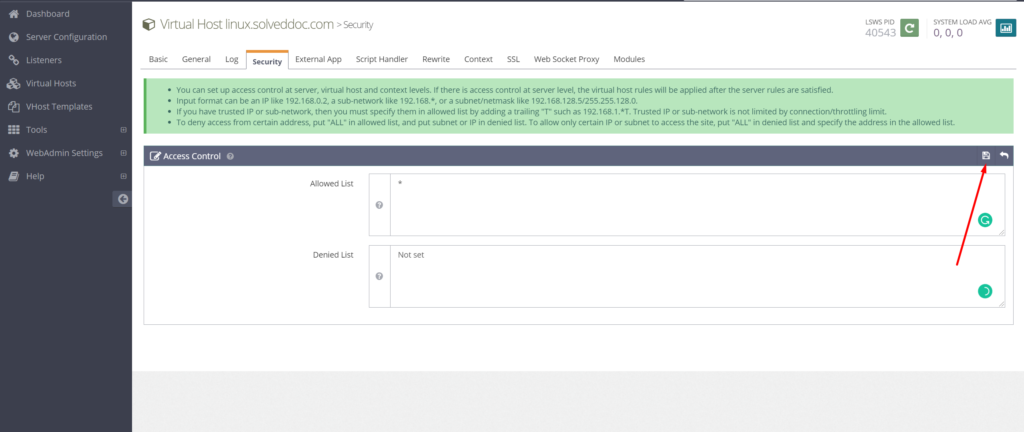
Click Save when done. Next, we need to configure Access Control under the Security section.
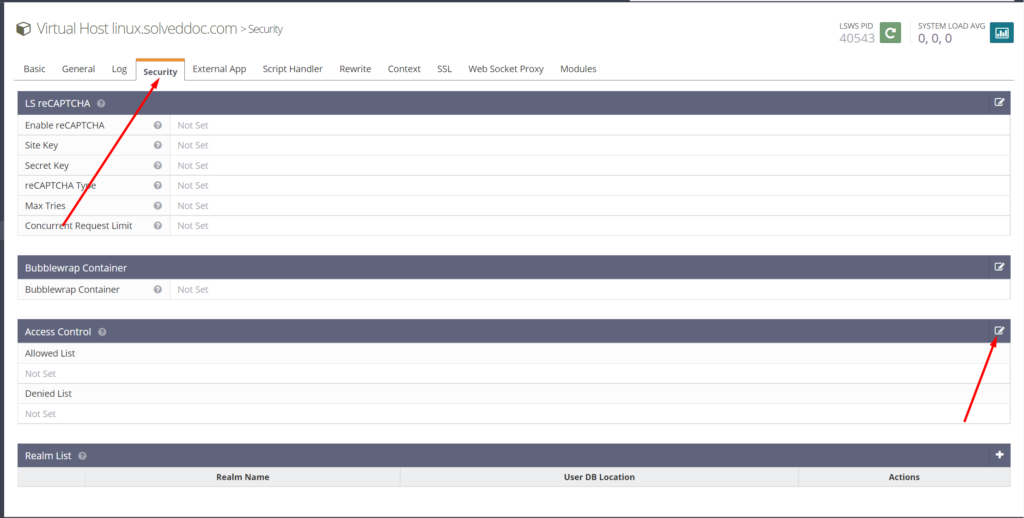
Set the following Values.
Allowed List: *
Denied List: Not set
add this and click on the save button.
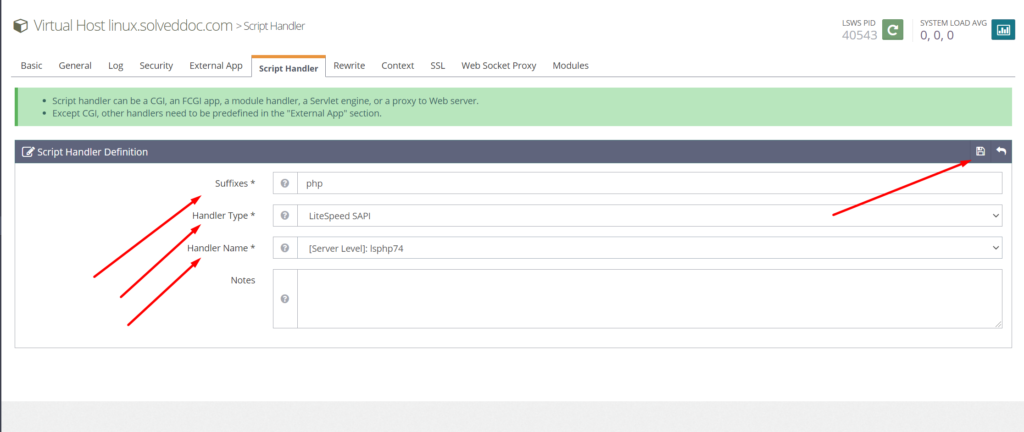
Next, we need to set the Script Handler Definition.
Set the following values.
Suffixes: php
Handler Type: LiteSpeed SAPI
Handler Name: [Server Level]: lsphp74
add these values and click on the save button.
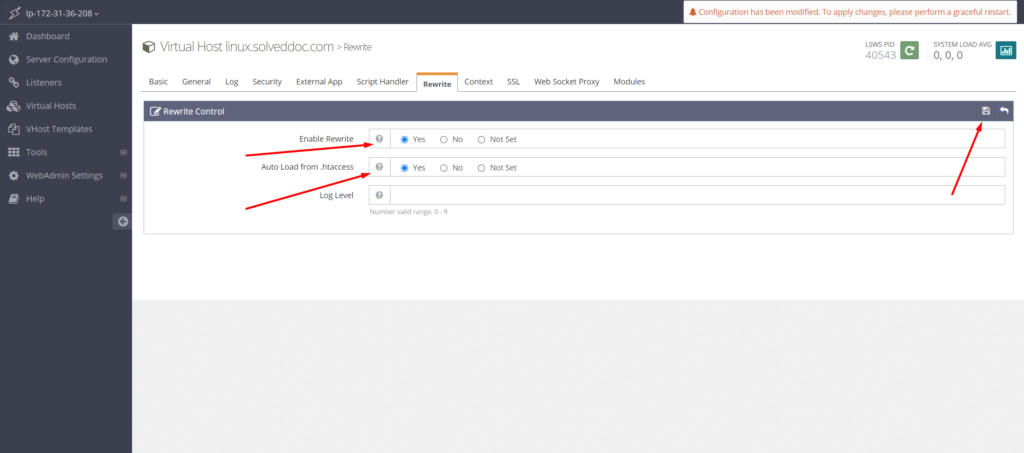
Next, we need to set Rewrite Control under the Rewrite section. Set the following values.
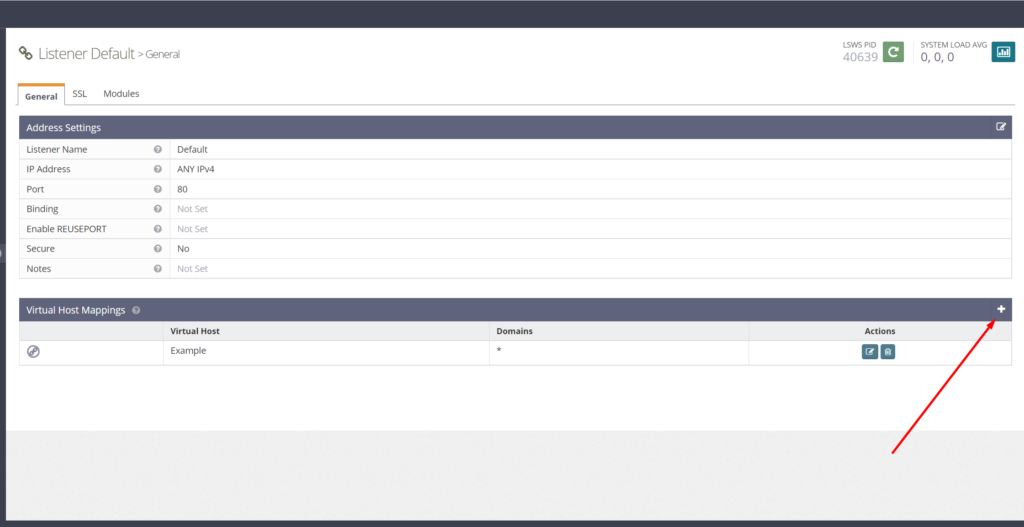
And at last, we need to set the Listeners. Go to the Listeners section and click on the view button against Default Listener.
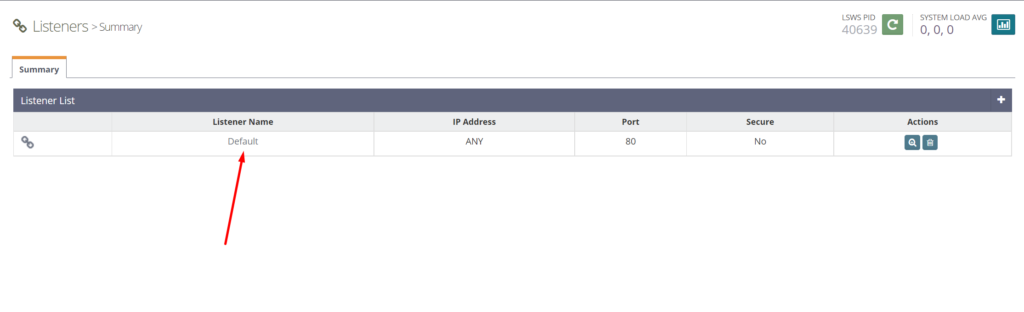
Then, click on the Add button against Virtual Host Mappings to add a new mapping
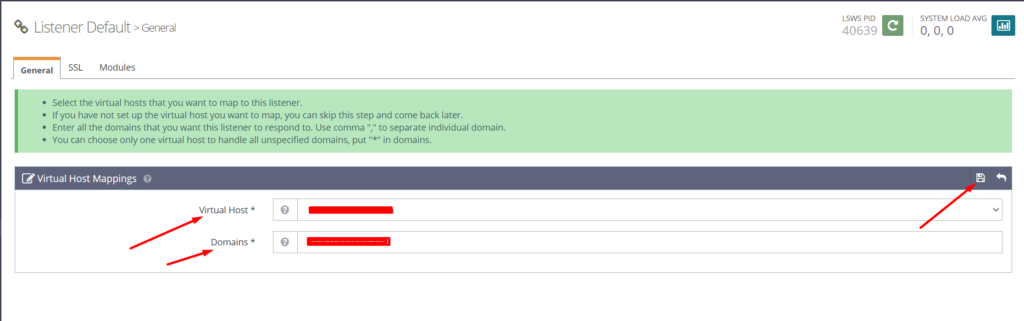
set the following values and click on the save button
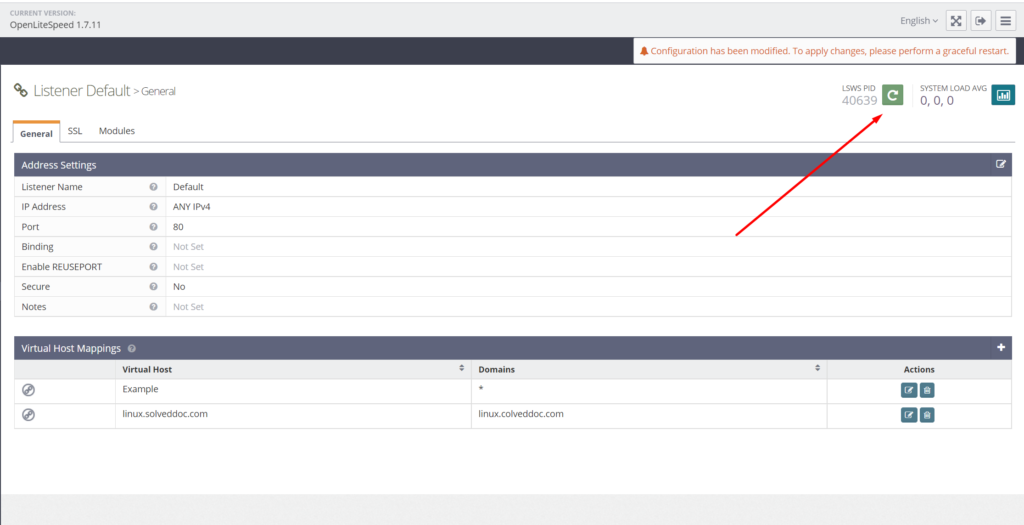
after setting these values you can see the restart graceful option on your screen right corner

Now, click on the Graceful restart button to apply all the changes above and restart the server.
all configurations are set to Install and configure the OpenLiteSpeed server on Ubuntu.
How to perform a Stress Test on your Web application using CyberLoader?
Follow CyberLoader on Facebook / Twitter.
Join our Facebook group.