CyberLoader is a newly launched platform to perform real-time stress tests on your web applications. CyberLoader is a platform where you can check the RAW performance of your web application or API. Before going into further details please note that CyberLoader.net is not a GTMetrix alternative. We put your site through 1000s of web requests so that you know how well your Web Application or APIs will perform under heavy load which basically means that how your site and server will perform when you receive actual traffic to it.
Right now you can stress test your site with:
- Upto 5 concurrent clients.
- Upto 10,000 Requests.
1. How to add new Domain in CyberLoader
The process of adding a Domain on CyberLoader is pretty easy and quick. This process include the addition of the Domain and its verification.
1.1 Add Domain:
From the top menu just go to Domain->Add New Domain

Domain->Add New Domain
Now write the URL of your domain which you want to add here. Like:
example.com
You don’t need to add http:// or https:// in front of your domain.
Add URL and press Add Now button.
1.2 Verify Your Domain:
After adding your domain you will shift to the next screen there you have to verify your domain. Please complete domain verification because without verification you wont be able to run tests.
Here you have two way to verify your domain.
First is the go to your domain public_html folder and create a txt file with the name that is give on your screen.
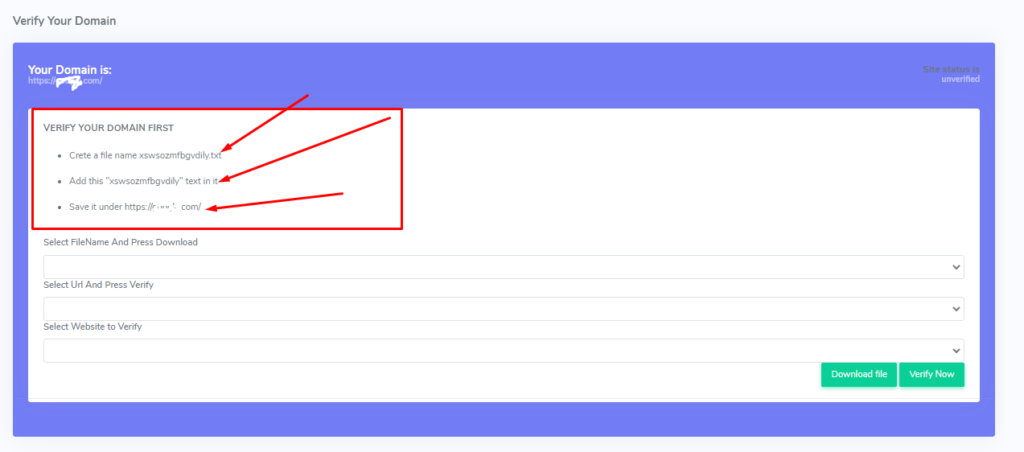
The second way is pretty easy than this. Just select the file from the below option (Select FileName And Press Download) and press the Download file button.

After adding this file to your domain now select the target URL and the domain base URL. Select proper value in Select Url And Press Verify and Select Website to Verify and now press the Verify Now button.

Once domain is verified now its time to run a test on your domain.
2. List already added Domain:
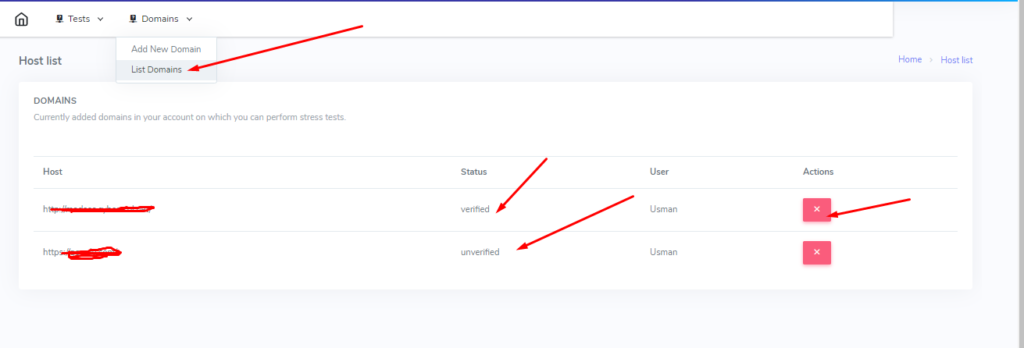
You can list all of your already added domains from the Domain->List all Domains. Here you can check the status of your domains such as verified or unverified.
You can also delete not-needed domains.
3. Run a new stress test:
You can perform test on you already added website. To perform test simply go to the Tests->Run New Test.

Run a new stress test
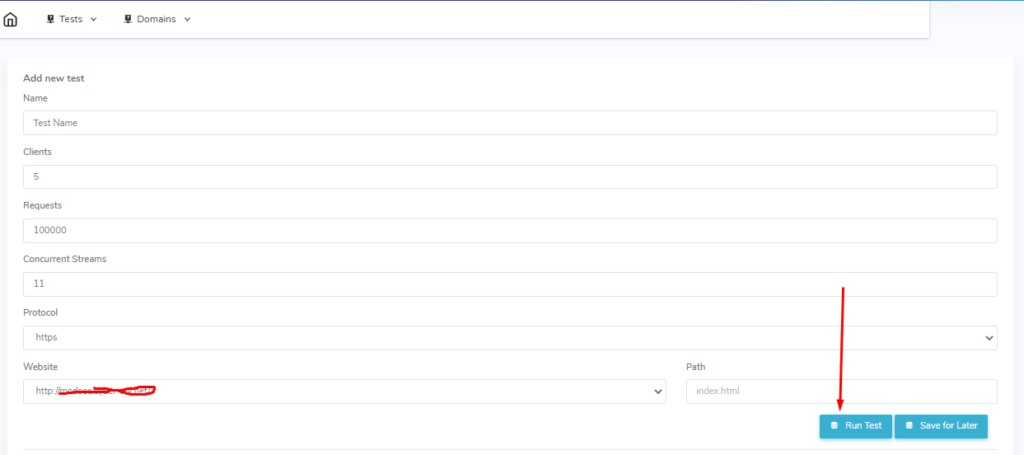
On the run test your have to provide few details.
- Name (This can be anything that you can remember later and should be unique).
- Clients (How many clients you want to add for the test, max 5 )
- Requests (number of requests you want to send on the server max 10,000)
- Concurrent Streams (number of Concurrent Streams max 5 )
- Protocol
- Website (select website among your added domains)
- Path (Specify which path/url on your website you want to run the stress test on)
After providing all these details press Run Test.
Run a new stress test
If you don’t want to run this test on the spot you can press Save for Later and save this test to perform later.
4. View Results:
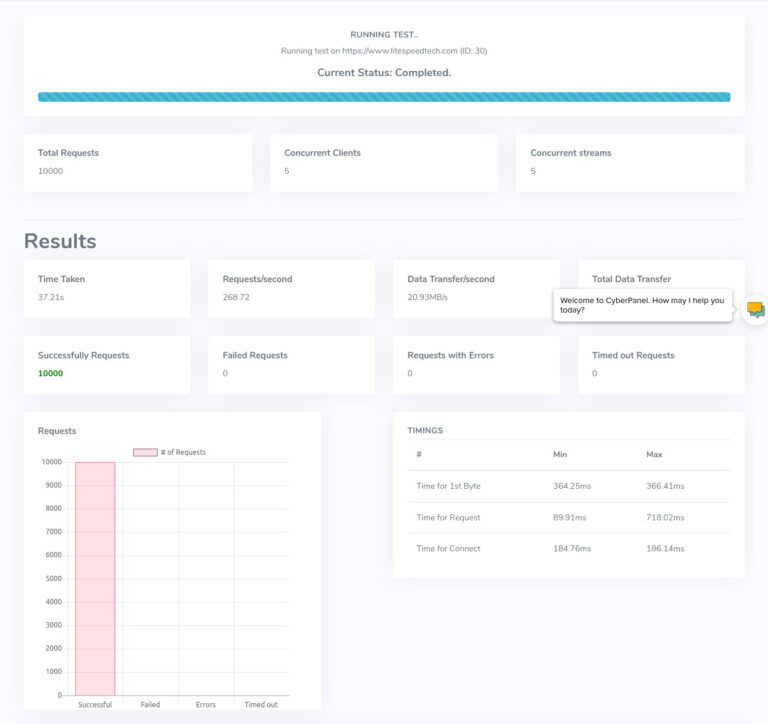
When you pressed the Run test button you will be moved to new window where you can see the progress in real time.

In the results you can see a lot of data like:
- Time Taken
- Requests/second
- Data Transfer/second
- Total Data Transfer
- Successfully Requests
- Failed Requests
- Requests with Errors
- Timed out Requests
Graph also show in the results.
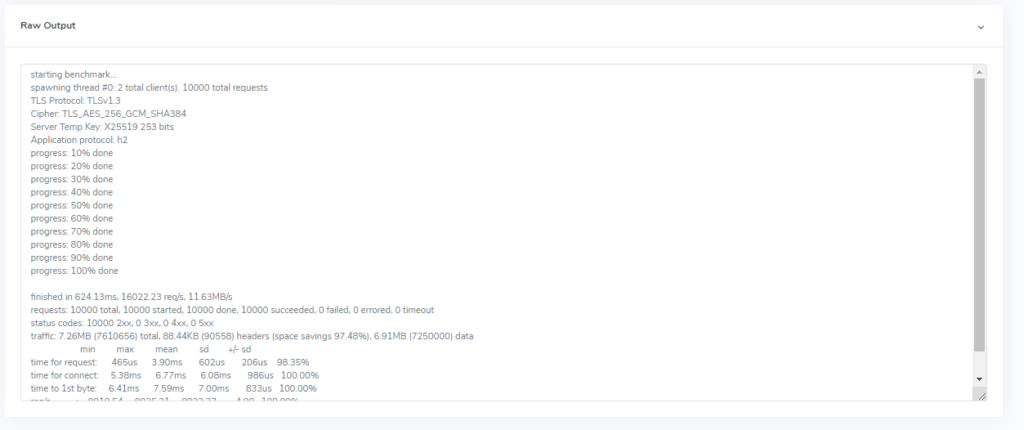
You can also check the RAW results from the below tab in results page. Press RAW out put button and check the RAW output of you stress test.
5. View already performed tests
To check the tests you already performed you can go to Test-> List Test. Here you can see all the tests you performed before and can delete any if you want to do.
